The post Phalaenopsis Orchid Care appeared first on ColorMeKevin.com.
]]>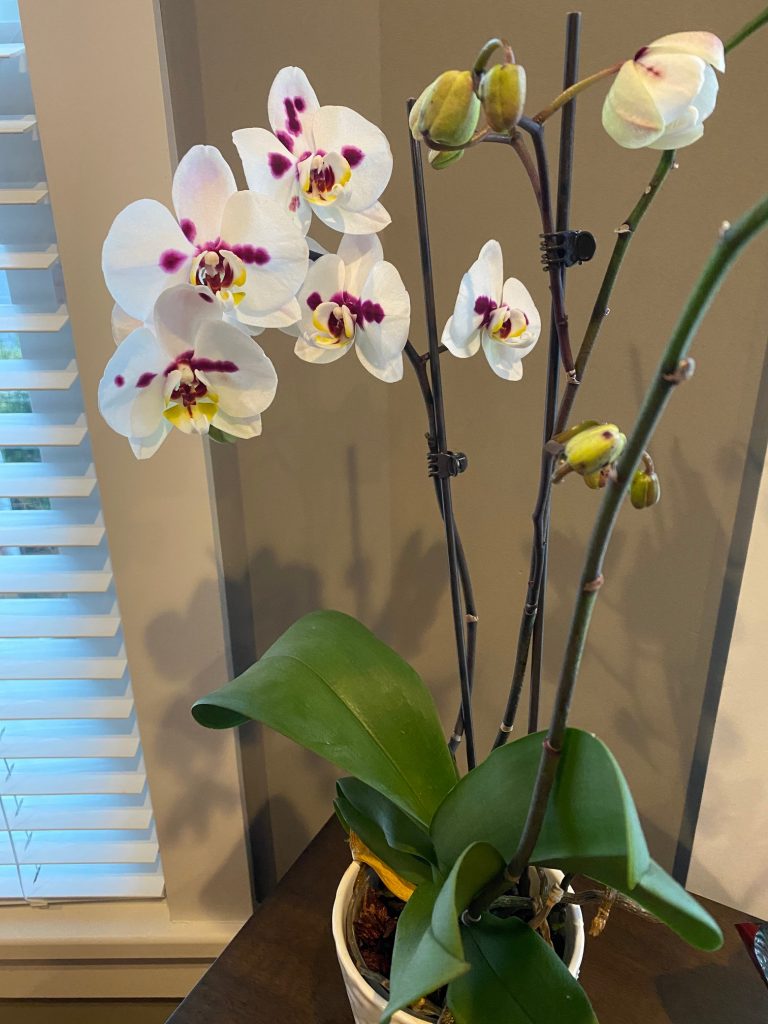
In recent years, I’ve become somewhat obsessed with orchids. That started with just buying & replacing them when the blooms were spent. Now, I’m finally able to get them to re-bloom and flourish! Here’s my crash course on how I do it!
So let’s start with the most common problem people have with orchids. Water. Orchids, like all living things, need water to survive. They love humidity, and they need to be watered, BUT there is a caveat. They HATE to be wet. In the orchid world, specifically what is said is “orchids hate to have their feet wet” meaning if their roots are in constant contact with moisture, they will rot! The issue here is that when that happens, they exhibit signs of dehydration. Limp, soft leaves, yellow leaves, etc. This leads to people giving them more water, killing them even faster.
So here are the key take-aways…
What NOT to do:
- Do NOT overwater
What TO do:
- Water when potting mix is DRY.
- Fertilize (weakly, weekly)
- Plenty of filtered sun
The post Phalaenopsis Orchid Care appeared first on ColorMeKevin.com.
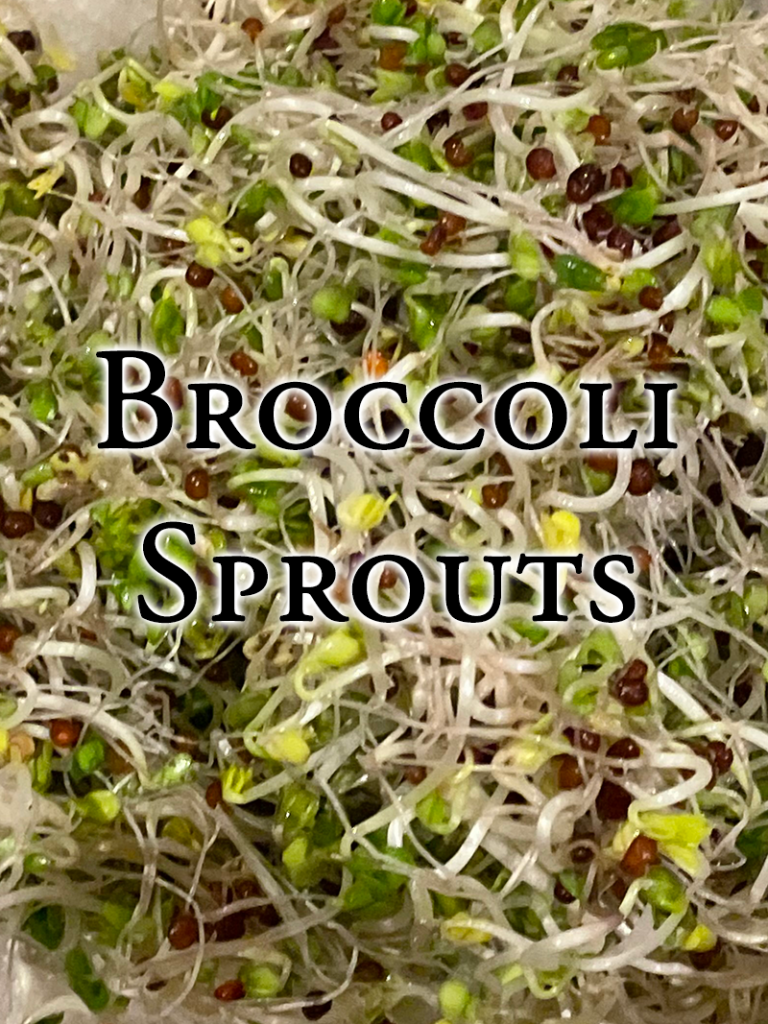
]]>The post How to Grow Broccoli Sprouts appeared first on ColorMeKevin.com.
]]>
Broccoli sprouts are an amazingly healthy, easy to grow crop that go with just about everything. They are easy to incorporate into your daily life and you’re body will thank you! Before you read on, know I’m not a doctor or scientist. This information is based on my research and I’m throwing out the disclaimer that you should do your own research and decide what’s best for you. This information is not intended as medical advice.
What Are Broccoli Sprouts?
Broccoli sprouts are just that – they are tender baby broccoli plants! They are eaten when only a few days to a couple weeks old. They can be used on salads, on sandwiches and wraps, or really just about anything! When I’m being lazy, I just throw sprouts in a bowl with some balsamic! (have you tried all the new balsamic vinegars available on the market? A couple of my favorites are cranberry pear white balsamic and fig balsamic! Thanks Olivia for the great gift!)
Health Benefits of Broccoli Sprouts
Along with fiber, protein, and vitamins, broccoli sprouts have high levels of a chemical called glucoraphanin. Yes, broccoli also has glucoraphanin, but broccoli sprouts have 10-100 times the glucoraphanin as the adult plants. So What is glucoraphanin and what makes it so special? Glucoraphanin, once in the body, is converted into sulforaphane. Sulforaphane is being shown to protect your cells from inflammation and a wide variety of diseases.
Things broccoli sprouts may be good for…
Cancer Prevention
In today’s society, this one is huge. We’ve all been affected by cancer in one way or another. We’ve had friends and/or family members that have had to go through the battle with cancer, or maybe have it gone through it ourselves. It’s scary! And we still don’t have a good answer for it. Now, while no one is claiming that broccoli sprouts can cure or prevent cancer on their own, why not add this one simple food to your diet so it can be one of many tools to help with cancer prevention? Over there years, we’ve seen many studies that show the benefits of cruciferous vegetables (such as broccoli, cauliflower, cabbage, etc) in protecting against various cancers (note: these studies are based on raw, or lightly cooked vegetables) The sulforaphane in these veggies is being shown to slow tumor growth and stop benign carcinogens from converting into active carcinogens.
One study showed that just 3 to 5 servings of cruciferous vegetable a week can reduce cancer risk by up to 40%! Considering how easy it is to add these foods to your diet (especially in the form of sprouts) why not just do it?!
Stomach Ulcer Treatment
The sulforaphane found in broccoli sprouts helps fight the bacteria that leads to ulcers – it may be more effective than treating ulcers with traditional antibiotics!
Mental Health: Now this is quite interesting. Can broccoli sprouts help with such things as depression and schizophrenia? Maybe! Researchers have found that sulforaphane may help reduce levels of a chemical called glutamate which has been linked to those disorders. While it doesn’t look like broccoli sprouts are slam dunk in treating those, with no negative side effects that I can find, why not just add broccoli sprouts to your diet…just in case?
Nutrition
Now, more of the good stuff. While being extremely low calorie, broccoli sprouts are packed full of fiber & protein. As I mentioned, they have 10-100 times the glucoraphanin as adult broccoli plants, and and they’re bursting with nutrients including:
- Vitamin C
- Vitamin A
- Calcium
- Iron
While nutrition facts can’t really be nailed down – I’m guessing this is because it has to do with water supply, genetics, etc, a decent general analysis for a cup of broccoli sprouts is:
- Calories: 20
- Fiber: 2 grams
- Protein: 2 grams
- Carbohydrates: 2 grams
- Sugars: 0 grams
- Fat: 0 grams
How to Grow Broccoli Sprouts
And now what you’ve all been waiting for! Broccoli sprouts are so easy to grow! (The links below are affiliate links, so please click on them if you wish to buy. It helps support my site)
What you need:
- Wide Mouth Mason jar (I use a 1 quart jar) – Pick these up locally and they’re a lot cheaper than ordering online!
- Screen mason jar lid OR this kit that has a 2 jars and lids (this makes filling and straining fast and easy as well as being breathable)
- Broccoli Sprout Seeds (I always get organic – and this brand I’ve found is high quality)

Step 1: Put two spoonfuls (standard tablespoon for eating, not a measuring spoon) of broccoli sprout seeds in a mason jar. Screw your screened lid on the jar. Step one complete!
Step 2: Fill your jar 1/4-1/2 way with water to soak seeds and let rest overnight or about 8 hours.
Step 3: Drain the jar and leave upside down or at 45 degree angle for a few minutes to drain water well. When all water is drained, roll the jar around. The seeds will cling to the sides of the jar. This is what you want! This will prevent the seeds from sitting in a pool of water at the bottom of the jar and keep them spaced out so they can breathe.
Step 4: Place the jar in a dark cabinet, closet or corner. While the seeds are sprouting, you want to keep them in a dim or dark environment. This will prevent them from getting bitter.
Step 5: Twice a day fill up your jar with some water, swish around to wet all of the seeds. Repeat step 3.
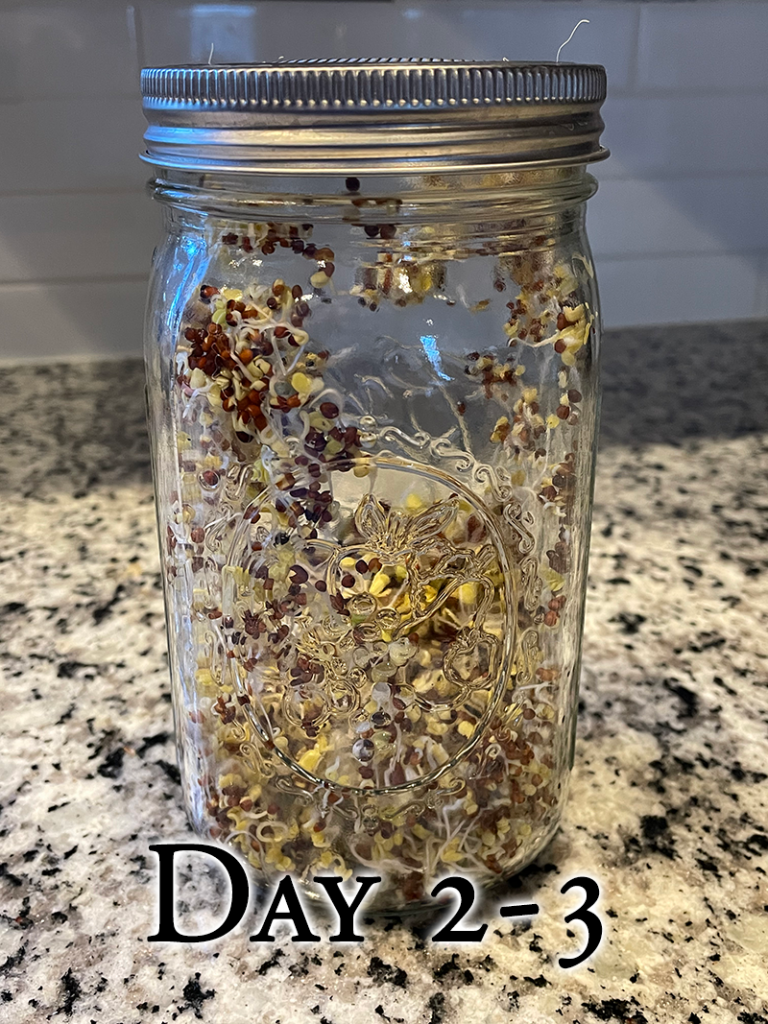
Step 6: After a 4 or 5 days, your jar will be full of sprouts!!! You’re almost there. Place the sprouts in a sunny window and let them green up a bit. I wouldn’t leave them for more than a day unless it’s particularly cloudy. One day will make them nice and green. Longer will risk making your sprouts bitter. After a day, you are ready to store your sprouts in the fridge and start your next batch!
Storing Your Sprouts
Just because growing the sprouts was easy doesn’t mean you want to waste them, so make sure you store them properly. The best way to store your sprouts is in the refrigerator. Since they are living sprouts, you don’t want to suffocate them or drown them. Simply dry your sprouts (either spin them gently or pat them dry with a towel) and store them in a breathable container. This can be as simple as a container with plastic wrap that you’re poked some holes in, or if you’re going to be store sprouts regularly (like I do) have a dedicated plastic or glass container with some holes poked in the lid. This will be some trial and error. You don’t want so much air flow that it dries your sprouts out, but you also want them to breath.
Using Your Sprouts
Now that you’ve grown your sprouts, there are so many ways to use these delicious, nutritious sprouts! My favorite way to use them is on wraps and sandwiches. But I also love adding them to salads, or if I’m in a rush and just want something fast and easy – throw them in a bowl and toss them with your favorite balsamic vinegar! That’s it! Enjoy!
The post How to Grow Broccoli Sprouts appeared first on ColorMeKevin.com.
]]>The post Spawning Red Glass Barbs appeared first on ColorMeKevin.com.
]]>
SPAWNING the RED GLASS BARB
by: WILMA DUNCAN
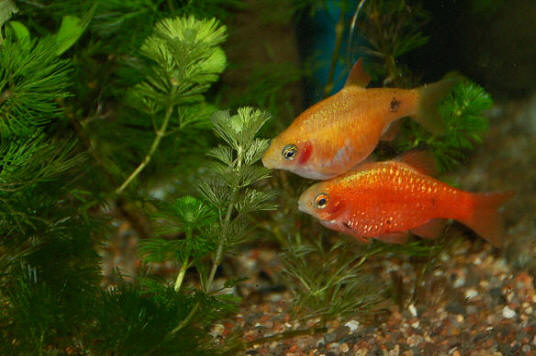
In late spring of 2001, a hobbyist friend sent me four of these beauties. I placed them in a 10 gallon planted tank. Several months passed by and these barbs became more beautiful. The male was a deep reddish orange color; the female was a light yellow with a light cast of orange.
One morning, I decided to try for spawn from these beauties. I had lost one, but one male and two females remained. I set up a 10 gallon tank filled 2/3 full and 1/3 aged water. My pH was 7.4 and the water was on the alkaline side. I used a submersible heater with temperature set at 78 degrees. I added a tablespoon of aquarium salt to the tank water. My filtration consisted of a small sponge filter. I planted the tank with Java Moss, Java Fern, Anacharis, and Hornwort. Later that evening I added the pair, turned off the tank light and raised the temperature to 80 degrees.
The next morning when I checked on the pair, the morning sun was shining inside the tank. I saw the male driving the female into the java moss. I pulled up a chair and watched the pair for more than an hour. The female was not cooperating at all with the male. She swam to a corner and hid behind the Anacharis. The male would locate her then head for the Java moss. This continued for quite some time.
Finally, the female headed for the Java moss and the male followed. He began to nudge the underside of her stomach and she began the barrel roll. The pair rolled throughout the Java moss. When she grew weary, she would hide behind the Anacharis, leaving her corner only to search out the eggs and devour them before my eyes. There was nothing I could do to prevent her quest for her own eggs.
Throughout the day, they continued their spawning act. Late that evening, I removed the pair and waited for the eggs to hatch. Three days passed and still no fry. I had seen some eggs being sprayed in the Java moss, so I knew there were eggs. Why were they not hatching?
The next few days kept me busy and I almost forgot about this tank. When I went back to check for fry, I found only six free-swimming. I added a small amount of egg layer fry food and later in the evening I fed live brine shrimp. Soon these six small fry had bulging bellies. I knew they would be ok and soon become large enough to be placed in the grown-up tank.
I waited a few months and tried another spawn. The fry had grown to be quite beautiful. I wanted more of these beauties. I had lost one of the females from the previous spawning trio and now had only a pair. The spawning set-up was the same as the previous one. The male and female spawned the next day and once again I removed them that evening. I found only four fry from this spawn. What was wrong? I knew my spawning set-up was the same I used for all of my barbs. An important key was missing.
I did not know their scientific name; so all my resource books were not helpful. I did learn that some barbs have different spawning methods and egg laying may occur over a period of days. Was this the problem? I separated them and fed them live foods for another month. I was determined to unlock the secret of spawning these beauties.
Once again, I set up a spawning tank using the same method as before, only this time I was prepared to take a chance and leave the pair in the tank for five days. I added some more Java moss to the set-up. I hoped they would not eat any fry that may hatch early. After the five day period was over, I removed the parents, placing the male in one tank and the female in another, just in case I would need to repeat the spawn.
Three days later, on a beautiful sunny morning, I checked the tank. There were four small free-swimming fry. I was disappointed. I wanted to find many more. Late that afternoon, I fed the fry a tiny amount of live brine shrimp. The following morning, I found three more fry and my hopes went soaring. Would I find more over the next few days? Only time would tell.
I discovered more fry during the next week. I had unlocked the secret and now knew why I had such small spawns. Apparently, these barbs only lay a few eggs over a period of days. The next few days I discovered more fry until I counted 28. I had so much Java moss and floating water sprite in the tank, I could not see well enough to find more. Only time and growth would allow me to get the total number of fry.
The fry are growing and becoming more noticable. Their color has changed from a pale white to a reddish tone and they have doubled in size. A few are tiny, telling me they were the last eggs lain. I am still searching for the scientific name for these beauties and am anxious to learn where they originate
The post Spawning Red Glass Barbs appeared first on ColorMeKevin.com.
]]>The post Snails in the Aquarium appeared first on ColorMeKevin.com.
]]>
Years ago, I built a website for a woman named Wilma Duncan. She is the author of this article. The site has since been taken down (Wilma’s the Cause, a non-profit that gave aquariums to classrooms, nursing homes, etc) but I wanted to keep her articles up and on the web…so here is her article about snails.
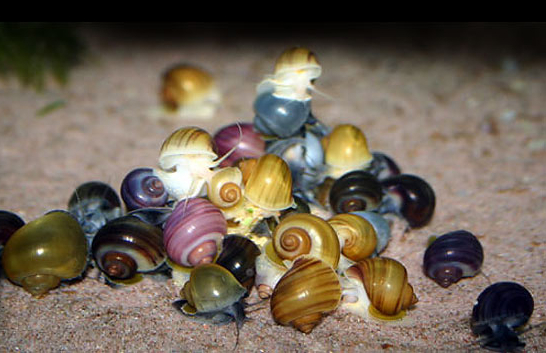
What can you keep in your aquarium besides fish and plants? Lovely snails. Except for a few species, most snails benefit the aquarium habitat. How is this possible? They are great cleaners, eating uneaten food, dead plant material, and consuming algae. They are a great food source; just watch a clown loach as he devours them. My favorite snails are the red, gold, and brown ramshorn, and Malaysian. I use these in all my fry tanks, from egg layers to livebearers. They will not harm fry as they clean up the uneaten food and consume any algae that forms. They are a handsome snail, reaching the size of 2.5 cm or so. Their shells take on a flat coil appearance. The Malayan snail (Melanoides tuberculata), small brown-shelled conical snails that burrow and help keep the substrate sweet and healthy. Rarely seen during the day, but come out at night and may be culled then, as they tend to over populate. They are carnivorous and eat decaying vegetable matter. I use these in my fry tanks for clean up. Beware of the Japanese livebearing snail (Viviparus malleatus), as it grows large and dangerous if it dies in the aquarium.Remove it promptly! The mystery snails are a variety of colors. Blue, gold, albino, cinnamon, and black are the most common found in the aquarium trade. The Gold Mystery snail (Ampullaria cuprina) can be housed with any fish that does not eat snails. It is not a live plant eater, only decaying plants and will eat any type of fish food. I have been told, if fed canned spinach, growth rate is astonishing. I have not personally tried the spinach. They are hermaphroditic, meaning each snail is male and female. The eggs are laid in a finger size cluster, consisting of a couple hundred eggs above the water line. If the babies are fed well they can begin laying eggs within four (4) months. I collect and keep the blue, gold, albino, and black mystery snails. The Olive Nerite snail is one of the greatest algae eaters I have seen. You can place one in a tank in which the glass is coated with algae and within a few days the glass is clean.
The post Snails in the Aquarium appeared first on ColorMeKevin.com.
]]>The post Fish and Aquarium Links appeared first on ColorMeKevin.com.
]]>One Stop Shop – Check out Drs. Foster and Smith at LiveAquaria.com
Photos of Beautifully planted tanks done by the master- Yakashi Amano
The post Fish and Aquarium Links appeared first on ColorMeKevin.com.
]]>The post Starting a Planted Aquarium appeared first on ColorMeKevin.com.
]]>I promise to add more to this section. Here are a few good pointers I learned.
1- A planted aquarium keeps fish waste out of the water very well…You plants eat fish waste and clean the water. you don NOT want to run carbon in your filter. When you run activated charcoal in a planted tank filter, you are stripping out all the nutrients/fertilizers you are paying to add to the water! In my tank, I ran one biological eheim filter, and one eheim canistar filter with ONLY filter floss. (Which is pillow stuffing from Walmart)
More to come. This is just a holding page for now.
The post Starting a Planted Aquarium appeared first on ColorMeKevin.com.
]]>The post My Aquarium Photos (Pre-CO2 Injection) appeared first on ColorMeKevin.com.
]]>In 2005, I had a MAJOR problem in my tank with Hair Algae. Being that I didn’t want to use chemicals in my tank, the only thing I could do was try and lower the nitrate levels in my tank. I began using deionized water, but the results were slow and not as good as I expected. Finally the guys over at the fish store (New World Aquarium in New York City) told me they had a fish in called Siamese Algae Eater. They look JUST like the algae eaters sold in the pet stores all the time, but they are different. For the longest time, I could not tell them apart, so I’m posting this to help those of you looking for these fish.
False Siamese Algae Eater

False Siamese Algae Eater
True Siamese Algae Eater (SAE)

Siamese Algae Eater
Now, here is how to tell them apart. As you can see below, (and above) the False Siamese Algae Eater has a CLEAR tail in the center. The Siamese Algae Eater has it’s black stripe continue all the way past it’s body and to the tip of it’s tail. This is the only definitive way I know of t tell the difference. When they are young, it’s a bit harder to see the difference. I hope this helps everyone out! If you have a hair algae problem in your tank, the SAE is one of the few fish that will make fast work of getting rid of it. (Flying Fox do a good job as well.) They are a fantastic addition to any freshwater community tank!
If you are looking for a great army of algae eaters get a few Siamese Algae Eaters, a few octo cats, and a bunch of Amano Shrimp. The combination will do a wonderful job cleaning up your tank!
False Siamese Algae Eater

False Siamese Algae Eater
Siamese Algae Eater

True Siamese Algae Eater
Updated Pic – 01/15/06
02/15/06

Updated Photo-10/16/05

My Bolivian Ram (He was my favorite fish. He passes away on 5/5/05)

Bolivian Ram
Wide view of Left Side


Cory Cats (They LOVE resting on the sponge filter-I keep it there so it’s ready for my nurse tank when I need it)

Farlowella

Ghost Cat

Golden Algae Eater

Keyhole Cichlid (They have great personalities, but are very shy)


School of Neon Tetras and the belly of my Octo

Side view of Octo on glass.

Octo taking care of my plants.

Left side of tank (I don’t have CO2 or a good substrate yet)

My Bolivian Ram Again. He loved to come to the glass and look at the camera.

One of the four new Siamese Algae Eaters I got to help with my hair algae.
The post My Aquarium Photos (Pre-CO2 Injection) appeared first on ColorMeKevin.com.
]]>